Sunday, March 20, 2011

Inexpensive way of tranferring Vinyl

EDITED ON 12/11/11: I read in another site that this hasn't worked for some crafters. Here's some tips that might be helpful. The vinyl I used is for indoor use. I rubbed down the wrap on top of each cut and  lifted a little bit the top corner of each letter with a spatula before attempting to remove the vinyl from the mat. I agree that it is not the easiest way of transferring vinyl, specially with very intricate cuts, but it is very inexpensive and works with very simple cuts like the ones shown in the tutorial.  Thanks for stopping by!


Not sure if someone else has already come up with this idea, but my DH suggested an inexpensive way of transferring vinyl. I was cutting some Car Decal and Robotz cuts to decorate my son's bedroom and he suggested to use GLAD Press n' Seal Multipurpose Sealing Wrap. It worked like a charm! It costs around $3.50 and it's about 23.7 yards long and 11.8 inches wide. Below is a photo tutorial I prepared explaining how to use it.  This is my first tutorial ever, so bear with me. Thanks for looking!

The first photo shows the materials and tools I used.  You need your adhesive vinyl cuts, scissors, Glad Press n' Seal Multipurpose Sealing Wrap, and SU! Decor Elements applicator.
Apply the Glad Press n' Seal Multipurpose wrap to the front of your vinyl cut (sticky part of the wrap facing down).
 With the help of the SU! Decor Elements applicator (fingers and old credit cards work too), rub the Press n' Seal wrap over each of the letters. See the two photos below.

Carefully remove the backing of the vinyl.  The vinyl letters stick to the Press n' seal wrap as shown in the pictures below.

Apply the letters to the surface. You may want to use a ruler to make a guideline so that your letters are straight.
 Press the letters with your fingers or the SU! Decor Elements applicator so that the adhesive vinyl stick to the surface and remove any air bubbles.
 Peel the Press n' Seal wrap off the letters and you are pretty much done.

 This picture is a close up of the finished product. 
This is an Expedit bookcase from IKEA and the doors were made from scratch by my talented husband.  Thanks for looking!!

Note: I was not sponsored by GLAD in any way or form :)

Friday, March 4, 2011

Blog Awards

Hello everyone, I am so happy to announce I have been awarded with two blog awards this week. First, I would like to thank Stacy from http://lovethatbug.blogspot.com/ for passing the "Liebster Blog Award" on to me. Please check out her wonderful blog:I will love to pass this award to the following blog:
1. Mary-Jane from http://invitedtoattend.blogspot.com/

Second, I would like to thank Donya for giving me the "Stylish Blogger Award". You can check out her awesome blog at http://okscrappinmama.blogspot.com/.

Following the rules I will pass this award to:

1. Lissa from http://somanycrafts.wordpress.com/

2. Dana, http://danascraftycorner.blogspot.com/

3. Donna, http://odonnasmith.blogspot.com/

4. Just2ducky, http://just2ducky.blogspot.com/

5. Mschiddy, http://www.chidscrafts.com/


In addition, rule #2 is to post seven random things about myself, so here they are:

1. My favorite singer is Juanes, a very good looking Colombian musician.

2. The Mavericks are my favorite basketball team.

3. My two favorite TV shows are The Little Couple and What Not to Wear.

4. I cried when I watched Toy Story 3.

5. I'm a night owl.

6. I published two articles in two different scientific journals the same year I was awarded with a Masters degree in Environmental Engineering.

7. My favorite color is brown.


Wednesday, March 2, 2011

3D Cupcake Giftcard Holder


Hello!! Hope you are having a wonderful week. Today I wanted to share a 3D cupcake giftcard holder my sister asked me to make for a friend of hers. I got the idea from the following YouTube video: http://www.youtube.com/watch?v=rkVm1Tif6gI . I cut the flowers using my Cricut Expression and the Tags, Bags, Boxes and More Cricut cartridge. Patterned paper is from Stampin Up! I bought the rest of the materials (solid color cardstock, ribbon, styrofoam ball, wooden bead for the cherry, pearls and glitter) at Michaels. Hope you like it.
Updated to change previous photo for a better one. This one was taken by my beloved sister.

Thursday, February 24, 2011

More V-day cards!

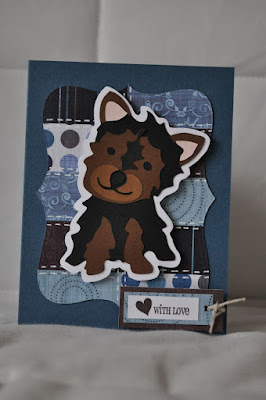
Hello! I have been pretty busy since the week before V-day. First my son got strep throat and was very sick for a week but thank God he is back to normal. Then I have been working like a maniac for the past two weeks but really wanted to share these three V-day cards I made. The one with the hedgehog I made it for my son. The one with the Chihuahua was for my husband. He loved it since it looks exactly as our fur baby! Finally the third one I made it for my male friends who are the proud parents of a little Yorkie called Bailey. I used the Cricut Four Legged Friends cartridge to cut the doggies and the Create a Critter cartridge to cut the hedgehog. I will update this post with a list of materials and tools later today... time to go to bed. Thanks for looking!

Sunday, January 30, 2011

Valentine's Day Card


Hi there, this is a card I made using my Cricut Expression. The owl cut is from the Cricut Give a Hoot cartridge and the word OWL is from Cricut Designer's Calendar cartridge. I used Cricut Design Studio to weld the word. I made these for my female friends and will be making different designs for my male friends and my dear husband. Hope you like it!

Tools:
- Cricut Expression
- Cricut Give a Hoot cart
- Cricut Designer's Calendar cart
- Paper crimper
- Paper trimmer
- Martha Stewart Scoring Board
- Hole punch
- ATG tape gun

Materials:
- Stampin' Up! Designers paper (from last's years mini catalog)
- SU! Chocolate Chip cardstock
- Bazzil cardtock for card base (dark red and craft)
- Paper source White Leaves Plat velum
- Pink, red and craft cardstock from HL
- SU! Hem twine