Wednesday, June 19, 2013

I'm back and my new Etsy shop

Hello my friends! It has been a while since my last post.  So many things have happened since then; from my son's surgery last week, to the lost of my beloved grandpa the last day of 2012.  

2012 was a busy year and so far 2013 is no exception. My son started school last year and with that, I lost my full-time craft partner.  At the beginning, I thought I would have more time to do my crafts...silly me.  School was a big change for our family and kept us very busy.  My until-then-so-healthy son caught every single virus/bacteria going around... he even got pneumonia. So much fun...NOT!

In addition, he developed allergies and this resulted in a chronic ear infection.  As recommended by his ENT doctor, last Friday tubes got inserted in his ears and tonsils and adenoids got removed.  He is recovering well and since my son's summer break was finally here, he didn't have to miss school. 

So my son has to take it easy for two weeks, therefore we are spending a lot of time home. I really don't mind it since summer is very hot were we live. We have been watching movies, playing games, coloring and of course doing crafts.  

Last week as I was all worried about my son's surgery and I was about to lose it, out of nowhere my husband suggested I should open an Etsy shop to sell my creations.  That was an idea I have had in my head a long time ago but never got to do it. Not even after some of my friends and my sister suggested I should do it and even once in a while I get e-mails from my blog's readers asking if I would consider selling some of my creations. 

Well, I am very self-critical and tend to think my cards/layouts, even though I do love how they turn out, they are not good enough to sell.  Anyway, after thinking about all the pros and cons, I decided to take the plunge and do it.  So let me introduce to you my brand new Etsy store:  Leirad's.  You can find it at etsy.com/shop/Leirads


I will be adding more items over the next couple of weeks.  I really hope you will love my products the same way I loved creating them. 

That's it for today.  Please wish me luck and thanks for stopping by my little blog.  Hugs,

Leirad

Thursday, November 1, 2012

SKdigis News and Monthly Release

Hello my friends, as some of you may know, I'm part of the SKdigis design team.  Sonia, the owner and designer of SKdigis, decided to stop the weekly challenge since this is the time of the year when everyone is so busy getting ready for the holidays.  The good news is that instead of weekly challenges, we're having a month long linking party.  Basically, you can link any of your creations using SKdigis as the main image for a chance to win a wonderful prize.  For more details about the linking party and rules, please go to SKdigis.

In addition, SKdigis will have monthly releases and each member of the design team will create samples showcasing the new images.  SKdigis new images for the month of November are way too cute and I had a hard time choosing an image for my sample card.  I ended up using the "Day and Night" image. Isn't the cutest thing ever?  I used Mojo Monday Sketch #250 and colored the image with Copics. I hope you like my sample card as much as I do.  


If you would like check out the rest of the design team's creations or to play along with us and be part of this month's linking party, head over to SKdigis.   Thanks for stopping by my little blog!


Wednesday, October 24, 2012

The Cat in The Hat Costume


Hello my friends.  Hope you're having a wonderful day. Today, I wanted to share with you The Cat in the Hat costume I made for my son.  Today is "Dress Up as a Storybook Character Day" at my son's school and since his favorite book is The Cat in The Hat, I decided to make a costume for him. 

For the hat I used a tutorial I found on Pinterest.  The lady at http://mamalusco.blogspot.com/2010/02/dr-seuss-hat-tutorial.html did an amazing job explaining how to make the hat.   I just had to make minor modifications to her design in order to fit my son's head.  

The Cat in The Hat t-shirt was my own idea.  I used an old black t-shirt, red and white felt.  I drew a pattern free-hand for The Cat in the Hat white belly and then transferred and cut it onto white felt.  Then I sewed the white felt to the t-shirt. Yup, that simple!

My son loved it and couldn't wait to wear and show off his Cat in The Hat costume today.  Hope you like it too! Thanks for stopping by my little blog and hope to see you soon!


Monday, October 8, 2012

Challenge 5: Spooky Nights

Hello friends, 

Hope you're having a wonderful beginning of the Fall Season! I'm enjoying the cooler temperature although I've been fighting a nasty cold since last week and still feeling under the weather. Being sick has kept me home a lot, so I have been spending some time on Pinterest and also I've been working on a couple of craft projects including a card for this week's challenge at SKdigis.
Let me start by saying that this week's challenge is sponsored by Barb from BugBites who has included one of Sonia's design in her recently released stamp set.  Isn't that amazing? This week's challenge is to create a craft/card/layout using any of the cute Ghost digis Sonia has in her shop. I created a card using the Scared Ghost digital image which can be bought here. Sentiment is computer generated. To check the rest of the DT creations or to link up your creations for a change to win this week's prize, please visit us at SKdigis.  

Hope you come and play along with us this week and thanks for stopping by!

Tools:
- Cuttlebug
- Cuttlebug Halloween embossing folder
- ATG 
- Brother laser printer
- Copic Markers

Materials:
- Aluminum foil 
- Twine
- GP black cardstock
- GP white cardstock
- Kraft cardstock from Joann's
- My Mind's Eye Mischievous 6X6 designer paper pad.

Monday, September 24, 2012

SKdigis Challenge No. 3: Spooky Delights in the Night!


Hello, it's challenge time again at SKdigis Challenge Blog.  This week' challenge is to create a card using a halloween themed background on your project.  It could be patterned paper, spooky words, or a digi background from SKdigis.

I created this card using the Monster #3 digital image from SKdigis. I colored this cute little monster using Copic markers. A complete list of materials and tools used on this card can be found at the end of this post.

If you would like to play along or to check out the rest of the Design Team creations, please stop by SKdigis Challenge Blog.

Thanks for visiting my little blog and see you soon!

Tools:
- Brother laser printer
- Crop-a-dile
- Sewing machine
- Copic markers

Materials:
- Wiggly eyes
- SKdigis Monster #3 digital image
- SU! ribbon (retired)
- GP black cardstock
- GP white cardstock
12x12 K&Company Spooktacular paper stack


Leirad

Monday, September 17, 2012

SKdigis Challenge No. 2: B&W + 1

Hello my friends!  It's challenge time at the SKdigis Challenge Blog.  For this week Sonia came up with a very interesting challenge:  create a card using black and white plus one color.  This includes enbelishments and paper choices.  

This is my take for this week's challenge at SKdigis Challenge Blog. I made a Birthday card using the cute Zebra image designed by Sonia at SKdigis.   I chose pink to be my + one color.    I had so much fun coloring this image using Copic and Bic Mark-it markers.  If you would like to buy the Zebra digi, you can find it here.


Hope you liked my card.  To check out the rest of the SKdigis Design Team creations and/or to submit your own for a chance to win a gift certificate valid at the SKdigis Shop, please visit the SKdigis Challenge Blog.  

Thanks for stopping by and hope to see you soon!


Tools:

- Bic Mark-it markers (grey and black)
- Brother laser printer
- Paper cutter
- ATG (double-sided tape dispenser)
- SU! scallop paper punch
- RV34 and R20 Copic markers

Materials:

- SKdigis Zebra image
- SU! Pearlized accent ink (for the Zebra's white stripes)
- SU! sentiment rubber stamp (retired)
- SU! Crystal effects (for the eyes)
- 12x12 DCWV The Black Currant paper stack
- GP white cardstock
- GP black cardstock
- SU! Melon Mambo cardstock
- Pink twine
- SU! Scallop circle die cut
- White pen
- Tuxedo Black Memento ink 

Friday, September 7, 2012

SKdigis $6 Gift Certificate Giveaway Winner

Hell my friends hope you're having a wonderful evening.  As promised, the winner of the SKdigis $6 gift certificate giveaway was picked today using random.org.  

The lucky winner is Amanda (post 11).  


Congrats Amanda!! I will email your gift certificate ASAP!

Monday, September 3, 2012

SKdigis Blog Challenge Inauguration Blog Hop


Hello,welcome to the SKdigis Blog Challenge Inauguration Blog Hop!
SKdigis and the wonderful Design Team which I'm proud to be part of is inviting you to join us as we kick off this new challenge blog with some inspiration using the cute and creative SKdigis images.

If you've come from visiting Kimberly Clark at Paper Munch, you're in the right place! If you've just happened across my blog and would like to join in the fun during our Challenge Inauguration Blog Hop, click HERE.

Each designer in the hop line up is featuring a project using one of the MANY digital designs you can find in the SKdigis Shop, even some freebies!


For this week's Challenge, I created the card above using the KSdigis August 2012 freebie.  This little bug is a cutie!  This card is for one of my dearest friends who's has recently been through a lot.  She's been trying to get pregnant for a year with no success and last Friday her mom had bladder surgery. Hope this will cheer her up!  I colored the image using Copics and had lots of fun with this cute image. Edited to add that I used Mojo Monday Sketch 255

What’s more exciting is that you can participate too by creating a project using any of the wonderful SKdigis images (She even has some freebies!) and linking it up over at SKdigis Blog for a chance to win a $6 gift certificate to SKdigis online store and a chance to be a guest designer. That’s not all…each DT member in the hop is also giving away a $6 gift certificate to the SKdigis online store as well. So that’s 14 chances to win!


But, there’s a twist. You need to visit all the blogs in the hop line up to collect the hidden words to reveal what the challenge is. Once you have revealed the challenge, link up your project over at SKdigis Blog so we can see your fabulous creations. For a complete list of challenge's rules, please click HERE.  

For my giveaway, all I ask you to do is to become a follower of my blog (if you are not already) and leave a comment in this post letting me know your favorite digital stamp from the MANY available at the SKdigis Shop and a way on how to contact you.  The winner of my giveaway will be picked using random.org and will be announced on Friday, September 7th.

Next stop... Larelyn Sartini's blog, Handmade From My Heart.  See what she has in store for you today.

Remember, once you have hopped to all the blog stops, it's your turn to show us your Challenge Inauguration Blog Hop project. Thanks for stopping by and looking forward to seeing all of your wonderful creations!


Deadline to link up your project is Midnight EST September 15 to be eligible for the prize.

Winner of the Challenge will be announced on Monday, September 17th.

Tuesday, August 21, 2012

Hippo-birthday card!


Today I would like to share with you a card I created using Skdigis' Happy Hippo digital stamp.  SKdigis is a new site offering cute digital stamps at very affordable prices!  The digital images are created by the very talented Sonia Kertznus.   If you like what you see, please stop by her site, SKdigis.  She has lots of cute digital stamps and she even has some freebies for you to try!  Sonia is officially launching her site on September 3rd and to celebrate it she will have a blog hop.  She will also have challenges every other week.  I'm honored to be part of her design team and I'm looking forward to creating with all of her wonderful digital images.  Hope you like it and thanks for stopping by!

Materials:

  • SKdigis Happy Hippo digital stamp
  • SU! Patterns Pack II pad (retired)
  • SU! Crushed Curry ribbon (retired)
  • Metallic mini brads (from Joann's)
  • GP white cardstock
  • My Pink Stamper More Punny-licious acrylic stamp set
  • SU! Crushed Curry cardstock
Tools:
  • Brother laser printer
  • Crop-a-dile
  • Copic markers 
  • Sewing machine
  • Tuxedo black Memento ink

I'm back!

Hello my friends! It has been over six months since my last post.  So many things have happened in my life since then... On April 10th we found out I was pregnant and even though we didn't plan it, we were very excited about the good news.  Unfortunately on April 18th, I started to have some bleeding and went to see my Ob gyn and he couldn't hear a heart beat... it has been the most painful experience in my whole life.

I do have to thank God for putting in my life my wonderful friends Jesus, Sergio and Ricardo. My husband was out of town when it all happened, so my beloved friends were there for me and my son.  I'm specially thankful to Sergio who took me to all the doctor's appointments and baby sat my little one while we were there. Good thing my dear husband made it in time for the procedure and gave me the support and strength I needed to share the bad news with my little one. My little one took it very well and I have to say that I'm amazed on how kids can understand things like this.  For me, it has been very hard but I'm trying to stay positive and thankful for the precious little one I have here with me and for my little angel in heaven.  

As you could imagine, I wasn't in the mood for crafting and I even considered selling all my stuff.  Funny thing, the same day I was going to prepare my stuff to sell,  my friend Sonia from http://skdigis.blogspot.com/ sent me an email inviting me to be part of her design team since she was launching her new digital stamps.  I took it as I sign that I should keep creating and accepted the offer.  So I will be posting my creations using her digis here in my blog and also in here challenge blog. Starting September 3rd, Sonia will have a challenge every other week where you can submit your creations for a chance to win one or two of her cute digital stamps.  You can check them out here: http://shopskdigis.blogspot.com/.  She even has some freebies for you to try.

Thanks for stopping by and hope you enjoy my post in the future.  Hugs and kisses.

Cuttlebug_fan

Monday, February 6, 2012

Home made Chocolate Covered Strawberries

Hello friends, today while my son, DH and I were watching PBS Kids Sprout, and a TV commercial about chocolate covered strawberries showed up on every commercial break.  The berries looked so delicious but after hearing how much half a dozen would cost ($19.99 plus shipping),  and since I already had all the ingredients on hand, I decided to make some myself.  First, I washed and dried the fresh strawberries.  I put them in the freezer for 15 minutes.  Second,  I melted the chocolate following the instruction from the package. I used Ghirardelli premium chocolate chips for baking, bittersweet chocolate and white classic.   Then I dipped each strawberry into the melted bittersweet chocolate, covering it in a layer of chocolate almost to the top.  I let the chocolate to drip off the excess and then placed each strawberry on a tray lined with wax paper.  I put them in the fridge for 5 minutes while I was preparing the white chocolate to decorate them.  As you can see, it was very easy to do and so much fun that even my dear husband helped me to decorate some of them.  They looked very good and tasted delicious!
Thanks for stopping by!

Tuesday, January 24, 2012

Problems with Blog's Background/Design

Hello friends, I hope you are having a wonderful week! I'm experimenting some problems with my blog's background/design and still need to figure out what is going on. I will try to fix it in the next couples of weeks, so I want to apologize in advance for any inconvenience this may cause. Thanks for your patience.  Hugs and kisses,


Leirad

Sunday, December 18, 2011

Christmas cards, neck warmers and tree skirt

Wow, I cannot believe it's been almost two months since my last post.  There have been a lot of things going on in my life for the past weeks, some good, some bad, so almost no time to be creative.   

Last week I decided it was time to go back to my craft room and start creating. Due to the time constraint, this year I only made one third the number of Christmas cards that I usually do, just for my closest friends and family.  I'm learning how to color with Copic Markers and wanted to use my brand new Magnolia Tilda stamp I bought last month.  For the card base I used Bazzill textured paper.  Patterned paper is from My Mind's Eyes (12 days of Christmas).

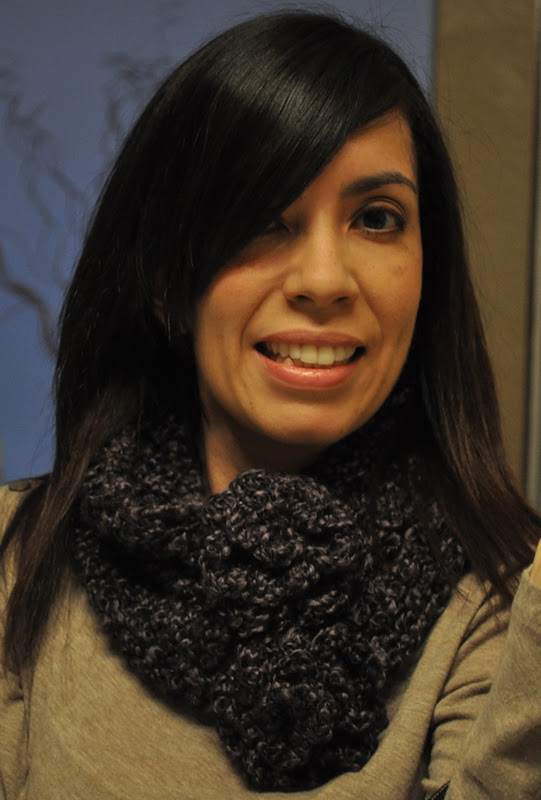
I also knitted a neck warmer for my sister and an infinity scarf for her fur baby (a tiny Chihuahua so into fashion), my niece Lola.  Hope they like them.  This is first time I make crochet flowers. I just followed the instructions from a Youtube video I found through Pinterest and I think they turned out okay.  Hope my sister and Lola like their presents.


Finally, I made a Christmas tree skirt using some felt for the base, some left over brown fabric, burlap in light brown, ivory and olive green, tons of hot glue, and some SU! Chocolate Chip felt ribbon (retired).  The tree skirt idea is not mine and I also found it on Pinterest. Can you tell I'm loving Pinterest?  I just modified it a little bit and instead of using 2" burlap strips, I used 3" strips. Isn't it pretty?


As you can see, it was a very productive week.  This week I will be getting ready for the Christmas Eve dinner (I'm cooking again this year) and want to make some baked goodies for my neighbors.  I will try to post pictures of all of it, but if I don't have a chance, I want to wish you a Merry Christmas and a Happy 2012. Thanks for stopping by!

Friday, October 28, 2011

Cricut 360 Challenge No. 15

Hello my friends.  It's time for another challenge at the Cricut 360!  Cold weather is finally here (well at least were I live) and with Winter in mind, this week's challenge is to create a card or layout ALL in white, no other color are allowed at all and using any of the Cricut Cartridges.  
My take for this challenge was to create a card using cuts from the CTMH Art Philosophy cartridge.   This cartridge is one of my favorites!! Cardstock is Georgia Pacific (Walmart) and glitter is from Martha Stewart Collection.  Since this card is all white I decided to used embossing to give dimension to it. Hope you like it!  To check out the amazing creations from the rest of the design team don't forget to stop by the Cricut 360 Challenge blog. Thanks for stopping by and have a wonderful weekend.

Wednesday, October 19, 2011

Giveaway Winner!


Hello my friends!  Just wanted to announce the Winner of my giveaway, a 8x8 DCWV Latte cardstock pad.   I used random.org and the winner was:


Post No.9!!
 Kimberli said...


What a beautiful banner - your whole fireplace looks amazing all decorated for Halloween! I'm a new follower!

Kimberli
kimbean20 at gmail dot com
http://kimberliscreations.blogspot.com/

Friday, October 14, 2011

Cricut 360 Challenge No. 14 - Blog Hop

Hello my friends!! It's time for another Challenge at the Cricut 360.  This week we have the Cricut 360’s Spooky Halloween Blog Hop!
The talented DT has created amazing projects for this week's challenge and blog hop.
If you've come from visiting Darlene at The Simple Southern Blessings' Blog, you are in the right place!


If my blog is your first stop and you would like to play along with our Spooky Halloween Blog  Hop, please start HERE.


Please, don't forget to visit the rest of the DT members' blog to check out their amazing creations for inspiration.  Also make sure you collect the key words that will reveal this week's challenge.  


There will be prizes along the way at some of the DT members' blogs, AND a grand prize, a  Freshly Picked Cricut cartridge.
If you want to play along, please link up your project over at Cricut 360.  

My take for this week's project was to create a Halloween banner to decorate the beautiful mantle my dear husband made (from scratch) for our fireplace. 


Edited to add that the plastic pumpkins (from Michaels) were hand-carved by my wonderful husband. I made the flowers arrangements for the pumpkins using flowers and ribbon I bought at Joann's.  
Tools:

  • Cricut Expression
  • Crop-a-dile
  • CTMH Art Philosophy Cartridge
  • Happy Huntings Cartridge
  • Stretch Your Imagination Cartridge
  • Doodlecharm Cricut Cartridge
Materials:
  • Black cardstock from Joann's
  • Whisper White cardstock
  • Recollections Halloween 12x12 cardstock pad (2010)
  • Black, orange, and green ribbon from Michaels
  • Eyelets
  • SU! brads
  • Braided wire

As an special thank you for participating on this blog hop, I am giving away a Latte 8x8 DCWV paper pack. You just need to become a follower of my blog (if you aren't already) and leave a comment in this post.  The winner will be randomly selected and announced on Wednesday October 19th, 2011. 


My key word is: AND 

Hope you really like my project and now please go and stop by Lisa's blog, Beyond Beauty to check out what she has in store for you today... And when you're done, make sure to link up your project to Cricut 360 for a chance to win!

Saturday, October 1, 2011

Make a wish B-day card

Hello my friends, hope you are having a wonderful weekend! Today I wanted to share with you a card I made for a good friend. Tomorrow is her B-day and I sent this card to her last week, so I hope it gets on time. For this card, I used sketch 207 from Mojo MondayThe butterfly was cut using my Cricut Expression and the Create a Critter cartridge.  All designer papers, cardstock, embellishments, and sentiment are SU! (most of them are retired). Thanks for looking!!

Friday, September 30, 2011

Cricut 360 Challenge No. 13

Hello, it's time for another challenge at Cricut 360.  This week's challenge is to create a Welcome Baby card or layout using white and pastel colors, any of the Cricut cartridges, and  your Cuttlebug (embossing).   This is my take for this challenge. Please visit the Cricut 360 blog to check out the design team amazing creations or to link up your own.  Thanks for looking!!!
Tools:
  • Cricut Expression
  • Stretch Your Imagination Cricut cartridge
  • Stapler
  • Cuttlebug Swiss Dots embossing folder
  • SU! Square Lattice Textured Impressions Embossing Folder 
Materials:
  • SU! Whisper White cardstock
  • SU! Love Stories Scrappin' Kit (retired)
  • Pink/White ribbon from Michaels

Thursday, September 29, 2011

Get Well Soon Card

Today I would like to share with you a Get Well card I created using a Sketch from I Heart 2 Stamp. I colored the image using Sketch Copic Markers.  Hope you like it!!Tools:
  • SU! Pun Fun Stamp Set
  • Sketch Copic Markers
Materials:
  • GP White cardstock
  • Bazzill Gray textured cardstock
  • The Paper Source green cardstock (don't know the actual name of it)
  • My Mind's Eye Happy Go Lucky 6x6 Designer Paper Pad (Lime Twist Collection)
  • Aqua Rick Rack
  • SU! Kiwi Kiss button
  • SU! hemp twine

Wednesday, September 28, 2011

Tilda Birthday card

Hello my friends! Hope you are having a wonderful week now that Fall is finally here. I have always loved the look of images colored using Copic markers but thought they were on the expensive side.  Last July my sister gave me a Michaels' giftcard for my B-day and since Michaels started carrying Sketch Copic markers, I took advantage of their 45% off coupon for entire purchase on artists' markers and bought a bunch.  My husband saw how I was excited about the markers, so he gave me extra money to buy some more.  


I really wanted to play with my Copics right away but unfortunately my work kept me pretty busy  for the last two months, so I didn't have a chance to play.  Things at work have finally slowed down and decided to give it a try.  This is the first time I'm coloring a stamped image using Copics and really hope you like it.  I know I still have a lot to learn, but wanted to show you what I have been doing. I have also been working on a bunch of other projects that I'm planning to share with you this week.  Thanks for looking!!


Tools:

  • SU! So Happy for You stamp set (2011 Sale-A-Bration)
  • Tilda Playing Hopscotch stamp
Materials:
  • GP White cardstock
  • My Mind's Eye Happy Go Lucky 6x6 Designer Paper Pad (Lime Twist Collection)
  • Aqua rick rack
  • SU! Dimensionals